
Your First Backend ✨
If you've been working on your HTML and CSS skills, maybe even dabbled in some JavaScript, you're probably ready to start building your first backend. In this article, we'll be using Node.js to create a simple backend that will serve as the foundation for your future projects.
Want to skip the reading and jump straight to the code? Click here to jump to the hands-on part of this tutorial.
What is a backend?
First of all, let's define what a backend is. A backend is the part of a web application that is responsible for processing data and responding to requests from the frontend. It's the engine that powers the frontend and makes everything work. The backend is responsible for handling things like user authentication, database operations, and business logic. But why do we need a backend? Can't we just build everything with HTML, CSS, and JavaScript?

Jokes aside, the two main reasons we need a backend are security and performance.
Security 🛡️
The most important thing for you to know about why we need a backend for security is that anything you load to a browser can be seen by anyone. If you have any sort of sensitive information in the browser, know this: it's not safe.
When a user creates an account on your website, you need to store their information somewhere, like a database. You need credentials to read and write data to a database. The reason you can't just send the user information from the frontend to the database directly is that you'd need to store your database password in the frontend, which would allow anyone to access your database as they please.
We can mitigate this issue by creating a backend, a program that receives the data from the frontend, validates it, and then sends it to the database. Your backend will have the database credentials, however, users don't have access to it, so it's safe.
Performance 🚀
Another reason we need a backend is performance. If your app needs to do a lot of processing it's better to do it on the server than on the client. The server is usually more powerful than the client, so it can handle more processing. Picture someone with a 10-year-old phone, 34 open tabs, and a bunch of apps running in the background. If you send them a list of 10,000 items and ask them to sort it, their phone will probably crash. If you do the same on a server, it will probably handle it just fine.
Setting up your environment
Before we start coding, we need to set up our environment. Nowadays, there are two ways we could go about setting up a development environment: using a local solution or a cloud-based platform. I'll teach you how to set up a local environment, but if you'd rather stick to the cloud, I recommend StackBlitz — it is better than solutions like Codesandbox that require you to run code in a VM; StackBlitz runs its IDE in your browser, and does so for free.
Local environment
Some of the following steps may vary depending on your operating system, but the general idea is the same. I'll be using macOS for this tutorial.
- Install Node.js: Node.js is a tool that allows us to run JavaScript
outside a browser. You can download Node.js from the
official website.
- Follow the instructions on the website to install Node.js on your machine.
- Install an IDE: You can use any text editor you like. I recommend using Visual Studio Code. It's free, open source, and beginner friendly.
Creating your first Backend
Create a new, empty folder for your project anywhere on your computer. Then open
it in your IDE. In VS Code, you can open a folder by clicking on
File > Open Folder... or by clicking on the Open Folder button on the
welcome screen.
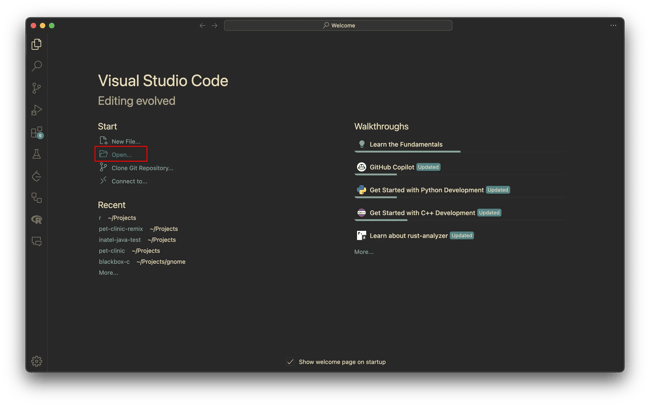
Once you have your folder open in your IDE, open a terminal window — you can do
this by clicking on Terminal > New Terminal in VS Code. In the terminal, run
the following command to create a new Node.js project:
npm init -y
This command creates a new package.json file in your project folder. The
package.json file is where you define your project's dependencies and scripts.
npm is a package manager for Node.js. It allows you to install and manage packages for your Node.js projects. Much like importing Font Awesome or Bootstrap in your HTML, you can import packages in your Node.js projects. However, instead of using a
<link>tag, install packages using npm.
Fun fact: npm stands for Node Package Manager.
In this tutorial, we'll be using a package called Express. Express is a lightweight web framework for Node.js that makes it easy to create web servers. To install Express, run the following command in your terminal:
npm install express
This command installs the Express package in your project. If you open your
package.json file, you'll see that Express has been added as a dependency.
Before we go any further, add a line to your package.json, right after
"version" and before "main":
{
  "name": "your-app",
  "version": "1.0.0",
  "type": "module", // Add this line
}
We can talk about the
typefield later, but for now, just know that it's necessary for the code we'll be writing.
Now that we have Express installed, let's create a simple web server.
Creating a web server
Create a new file in your project folder called index.js. This file will be
the entry point for your application. In index.js, add the following code:
import express from "express";

const app = express();
const port = 3000;

app.get("/", (req, res) => {
  res.send("Hello, World!");
});

app.listen(port, () => {
  console.log(`Server running at http://localhost:${port}`);
});
This code creates a new Express application, defines a route that responds with
Hello, World! when you visit the root URL (/), and starts a server that
listens on port 3000.
To test it out, run the following command in your terminal:
node index.js
This command starts your server. If you open your browser and navigate to
http://localhost:3000, you should see Hello, World! displayed on the page!
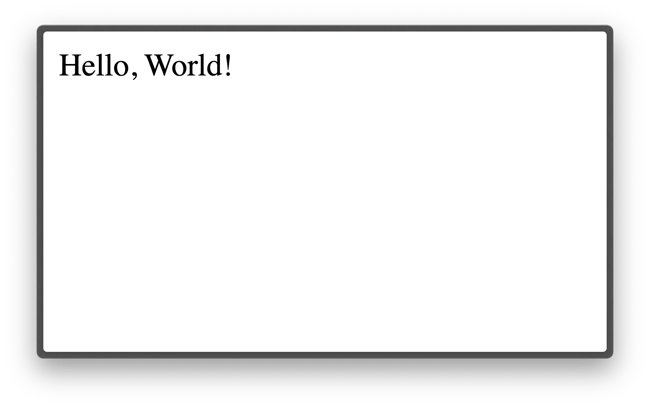
Congratulations! You've just created your first backend with Node.js and Express.
Understanding the code
Let's break down the code we just wrote:
// Import the express package we installed earlier
import express from "express";

// Create a new Express application
const app = express();
const port = 3000;

// Define a route that responds with "Hello, World!".
// More on routes later.
app.get("/", (req, res) => {
  res.send("Hello, World!");
});

// Start the server and log a message to the console
app.listen(port, () => {
  console.log(`Server running at http://localhost:${port}`);
});

// The server is now running and listening for requests. It will run
// until you stop it by pressing Ctrl+C in the terminal (or close
// the terminal window).
Read more about ports here
Routes
Before we elaborate on the code, let's talk about routes. A route is a URL pattern that the server listens for. When a request is made to the server, the server checks the URL of the request and matches it to a route. If the URL matches a route, the server executes the code associated with that route.
In the browser, you can think of each page you can visit as a route. For
example, google.com/ is a route, google.com/chrome is another route, and so
on.
In our code, we defined a single route that listens for requests to the root URL
(/). When a request is made to the root URL, the server responds with
Hello, World!.
Frontend vs. Backend routes
Note that in this tutorial we are developing a RESTful API. REST is a backend development architecture that, among other things, separates the backend from the frontend. It does so because a web server, such as the one we are creating, is capable of rendering HTML and CSS, serving images, files, and much more.
In a RESTful API, the server (backend) only communicates with the client (frontend) to exchange data. Think form submissions, user authentication, and database operations. The server doesn't care about how the data is displayed, only about how it is structured.
HTTP methods
The communication between the server and the client is done via HTTP. The HTTP protocol defines a set of methods that the client can use to interact with the server. The most common methods are:
- GET: Used to retrieve data from the server.
- POST: Used to send data to the server.
- PUT: Used to update data on the server.
- DELETE: Used to delete data from the server.
When you navigate to a website, your browser sends a GET request to the server to retrieve the page you requested. When you submit a form, your browser sends a POST request to the server with the form data.
Route methods
Most web servers, including Express, allow you to define routes for different
HTTP methods. In our code, we used the app.get() method to define a route that
responds to GET requests. You can also use app.post(), app.put(), and
app.delete() to define routes for other HTTP methods. It's important to note
that we can define multiple handlers for the same route.
If we had a bigger project where we needed to create and delete users, we could define routes like this:
app.get("/users", (req, res) => {
  // Get all users
});

app.post("/users", (req, res) => {
  // Create a new user
});
Notice how both routes have the same URL (/users), but they respond to
different HTTP methods. This is a common practice in RESTful APIs.
Making it useful
We've done a lot so far, yet our backend can only respond with Hello, World!
on a single route.
Let's make it a bit more useful by creating a simple API that returns a list of students.
// app.get("/", ...)

const students = [
  { id: 1, name: "Alice", age: 20 },
  { id: 2, name: "Bob", age: 21 },
  { id: 3, name: "Charlie", age: 22 },
];

app.get("/students", (req, res) => {
  return res.json(students);
});

// app.listen(...)
If you try navigating to http://localhost:3000/students, you won't get the
list of students. Instead, you'll get an error message saying that the server
cannot GET /students. This is because every time you make changes to your
server, you need to restart it. To avoid this, we can run the server with the
--watch flag:
# If your server is already running, stop it by pressing Ctrl+C
# in the terminal
node --watch index.js
Now, when you navigate to http://localhost:3000/students, you should see a
JSON response with the list of students. We can now return useful data, such as
arrays and objects from our server. Cool, right?
Consuming the API
So far, all of our testing has been done in the browser. Since RESTful APIs are not supposed to render HTML or display anything in the browser, we need some other method to use our API. That's where the frontend comes in.
Let's create a simple HTML file that fetches the list of students from our API.
<!doctype html>
<html lang="en">
  <head>
    <meta charset="UTF-8" />
    <meta name="viewport" content="width=device-width, initial-scale=1.0" />
    <title>Students</title>
  </head>
  <body>
    <h1>Students</h1>
    <ul id="students">
      <!-- Students will be added here -->
    </ul>

    <!-- Let's add some JavaScript to interact with our server -->
    <script>
      fetch("http://localhost:3000/students")
        .then((response) => response.json())
        .then((students) => {
          const studentsList = document.getElementById("students");
          for (const student of students) {
            const li = document.createElement("li");
            li.innerText = `${student.name} (${student.age})`;
            studentsList.appendChild(li);
          }
        });
    </script>
  </body>
</html>
Save this code in a file called index.html in the same folder as your
index.js file — this file could be stored anywhere else in your computer, but
for the sake of organization, let's keep it in the same folder as the rest of
our project.
Open the file in your browser and you should see... nothing.
That's because the server is blocking the request. This is a security feature called CORS (Cross-Origin Resource Sharing). It prevents websites from making requests to other websites without permission. Since we are not worried about other people using our API, we can disable CORS in our server.
I'll write more about CORS in a future article where we'll dive deeper into HTTP requests and security.
Warning: Disabling CORS may expose your server to security vulnerabilities. Be careful when doing this in a production environment.
To disable CORS in Express, install a package called cors:
npm install cors
Then, import and use the cors package in your index.js file:
import express from "express";
import cors from "cors";

const app = express();
const port = 3000;

app.use(cors());

// ...
Now, if you open your index.html file in the browser, you should see a list of
students displayed on the page. You've just created a simple frontend that
consumes data from your backend API!
Conclusion
In this article, we learned how to create a simple backend with Node.js and Express. We covered the basics of backend development, routes, HTTP methods, and how to consume an API from the frontend.
This is just the beginning of your backend journey. There's a lot more to learn about backend development, such as databases, authentication, and security. But for now, you should be proud of what you've accomplished.
I will be writing a follow-up article to this one where we'll dive deeper into backend development. We'll learn how receive data from the frontend (through forms, for example) and how to store and manipulate data. Stay tuned!
P.S.: the code in this article is available on GitHub