# Your First Backend 🔥 — Part 2
Author: Paulo Queiroz
Language: en
Source: https://raggesilver.com/blog/04-your-first-backend-part-2
Handling form submissions, storing data, and more.
In this post we will continue building our backend. This time we will handle
form submissions to receive data from the client and store it in our server.
This is the next step in our journey to create a useful REST API.
## Handling Form Submissions
Head over to `index.html` and add a form to the body. This form will be used to
submit data to the server.
```html
```
This form has an input field for the student's name and a submit button. The
`action` attribute specifies the URL where the form data will be sent. The
`method` attribute specifies the HTTP method to be used. In this case, we are
using the `POST` method.
> Unintuitively, HTML forms do not support all HTTP methods. The only methods
> supported are `GET` and `POST`. To use other methods, we need to use
> JavaScript. This is fine for now, as we are only interested in `POST`.
Now, let's add an end-point to our server to handle the form submission. Add the
following code to `index.js`.
```js
app.post("/add-student", (req, res) => {
const { name, age } = req.body;
students.push({ name, age: parseInt(age) });
res.send("Student added successfully");
});
```
This is not going to work yet. We need to tell Express to parse the body of the
request. Add the following code after `app.use(cors())`.
```js
app.use(express.urlencoded({ extended: true }));
```
Now we're ready. Head to the browser and submit the form.
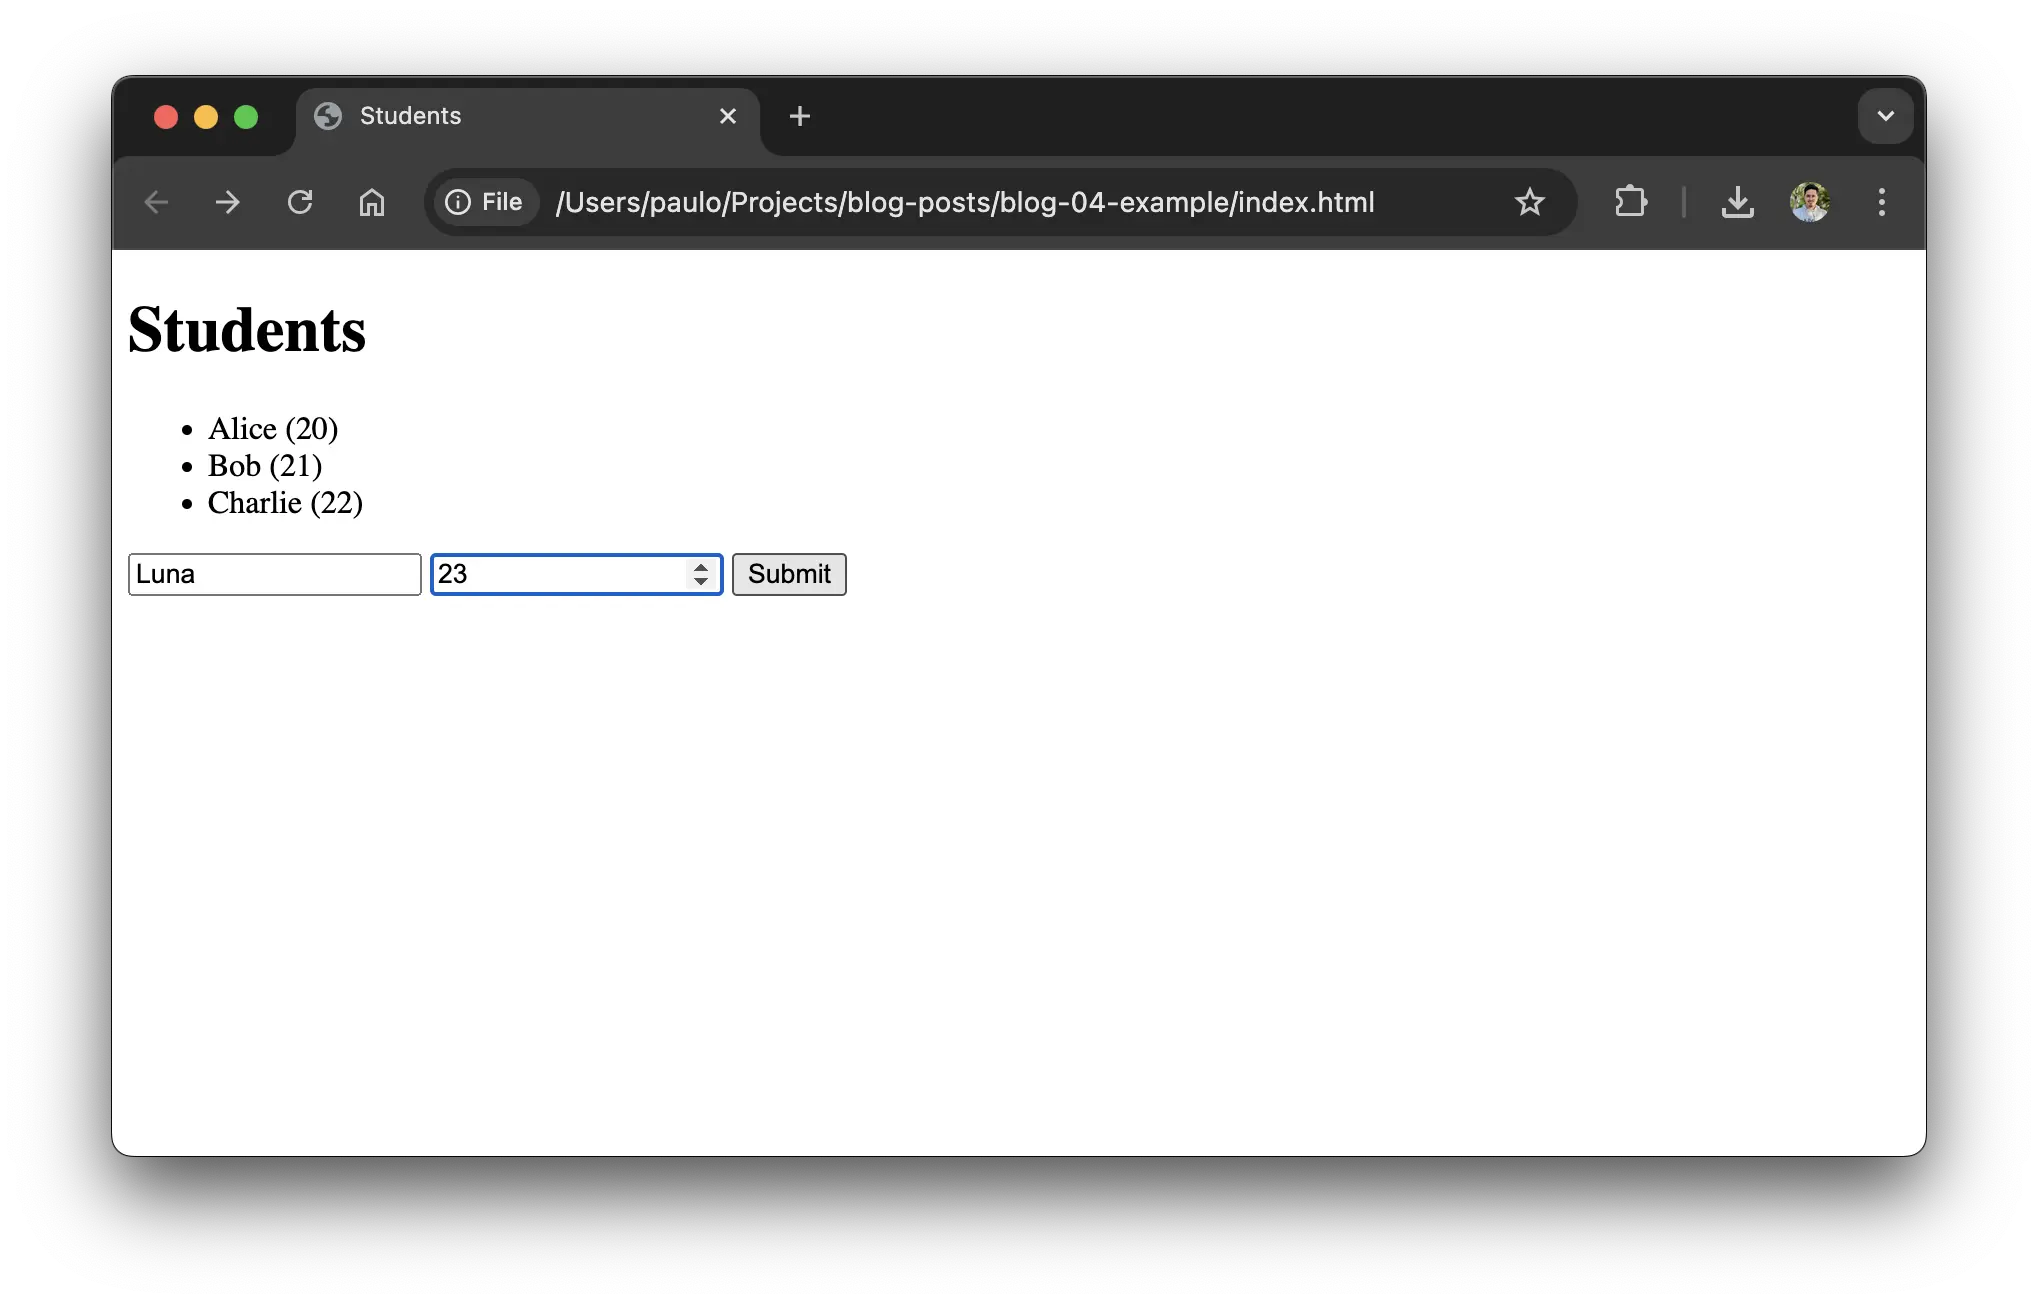
If everything went well, you should see a message saying "Student added
successfully". If you open `index.html` in your browser, you should see the new
student in the list.
## Add a Sprinkle of JavaScript
You might have noticed that submitting the form navigates to a different page.
This is the default behavior of HTML forms. We can prevent this behavior by
using JavaScript in the browser.
Add the following code to `index.html`.
```html
```
This code adds an event listener to the form that listens for the `submit`
event. When the event is triggered, the default behavior of the form is
prevented. The form data is then sent to the server using the `fetch` API.
> `fetch` is a tool available in mordern browsers that allows us to make network
> requests from JavaScript. See
> [MDN Web Docs](https://developer.mozilla.org/en-US/docs/Web/API/Window/fetch)
> for more information.
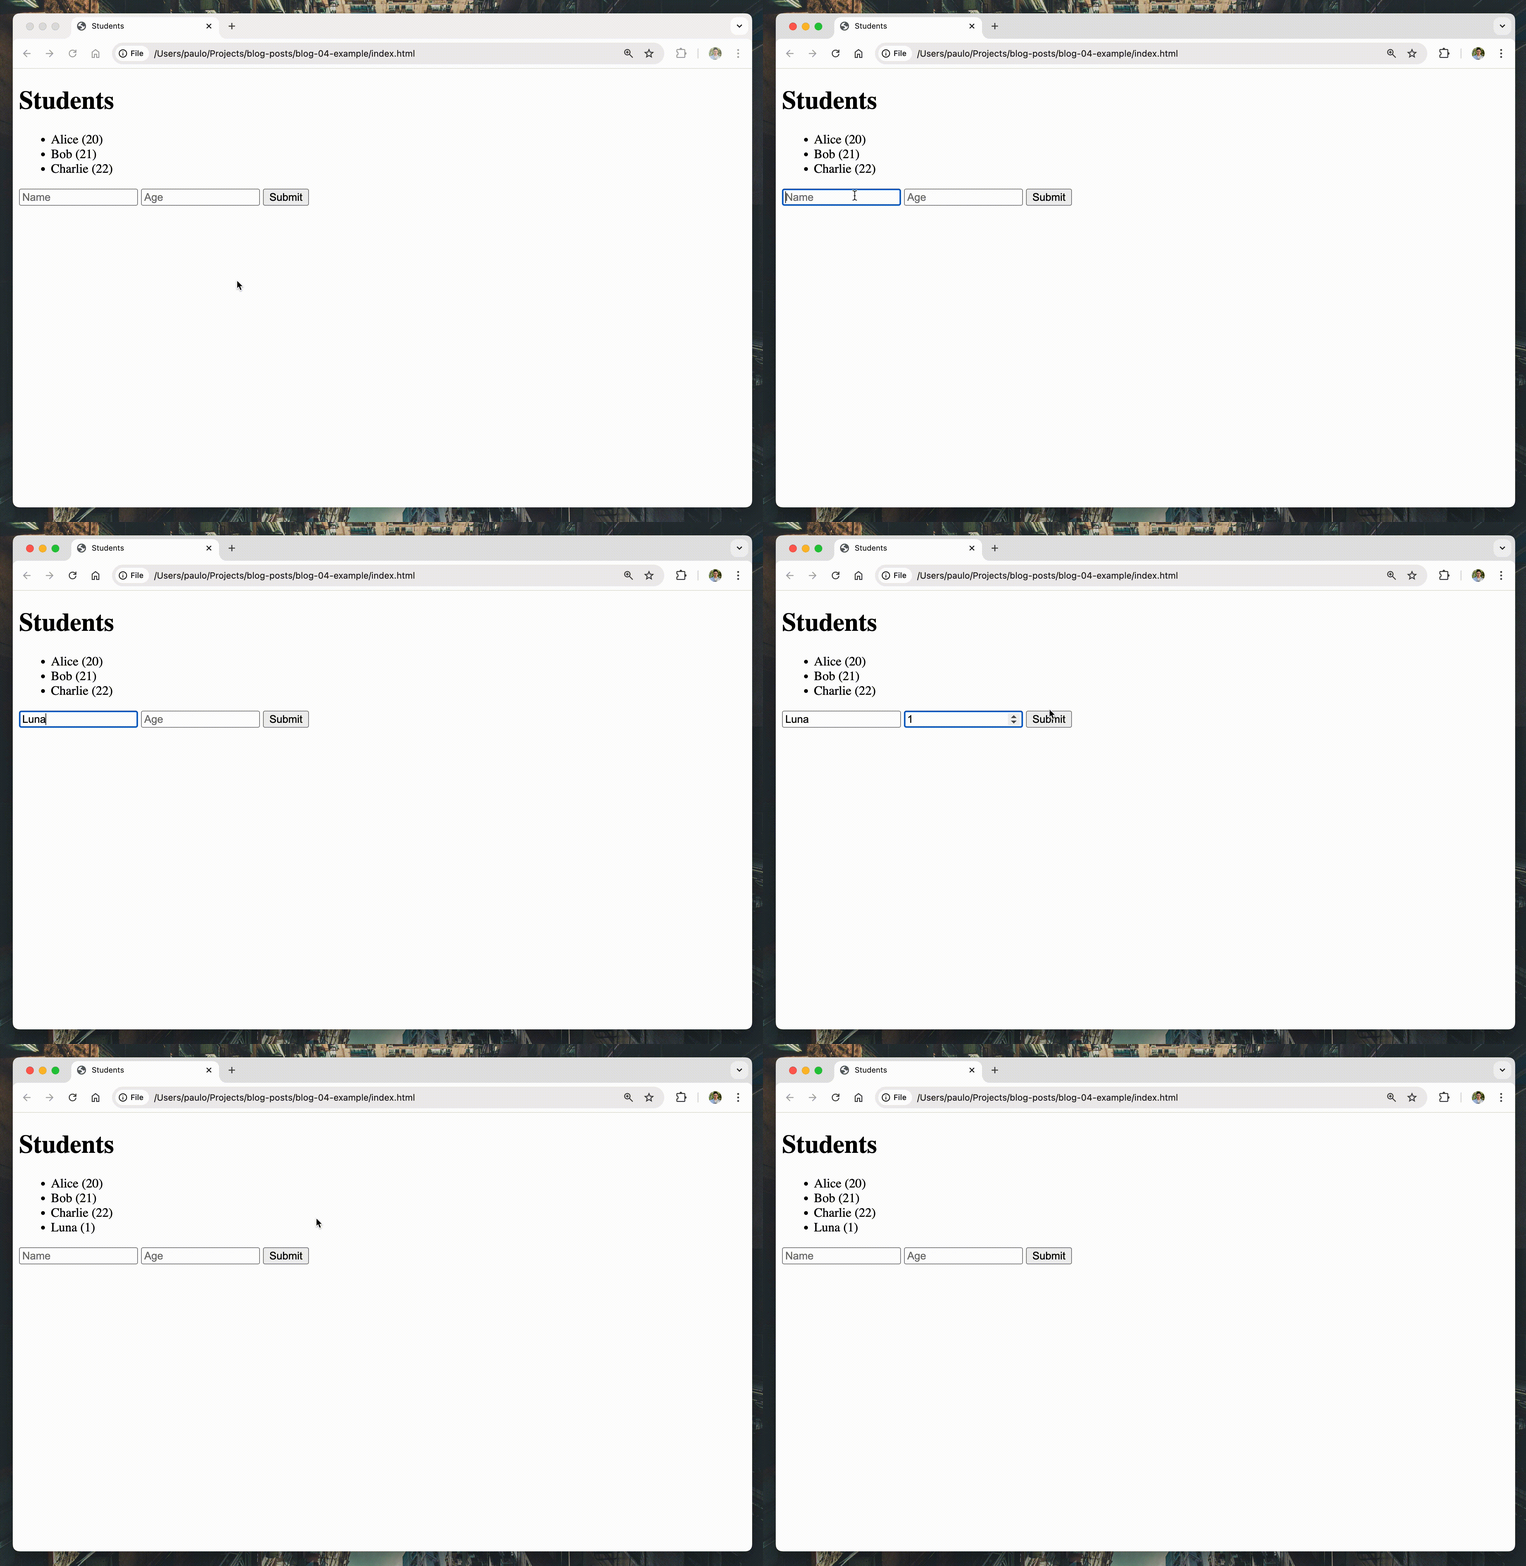
Now, when you submit the form, the page will not navigate. Instead, you will see
the message "Student added successfully". Pretty cool, right? Well, not really,
because we still can't see the new student in the list.
## Updating the List
To update the list, we need to do one of two things:
1. Reload the page.
2. Update the list using JavaScript.
Reloading the page is completely out of the question. We are developers, and we
can do better than that. Let's update the list using JavaScript.
To implement this we should first update our backend to return the new entry we
just added.
```js
app.post("/add-student", (req, res) => {
const { name, age } = req.body;
const student = { name, age: parseInt(age) };
students.push(student);
// Return the new student. Notice that we are calling `res.json` instead of
// `res.send`. This is because we are returning a JSON object.
return res.json(student);
});
```
> JSON stands for JavaScript Object Notation. It is a lightweight data format
> widely used to exchange data between a server and a client. It is easy to read
> as its syntax is similar to JavaScript objects. Actually, the JSON syntax is a
> subset of JavaScript object literal syntax.
Now, let's update the JavaScript code in `index.html` to add the new student to
the list.
```js
// const message = await response.text();
// alert(message);
const student = await response.json();
const list = document.getElementById("students");
const listItem = document.createElement("li");
listItem.innerText = `${student.name} (${student.age})`;
list.appendChild(listItem);
```
We are no longer parsing the response as text. Instead, we are parsing it as
JSON. This allows us to access the student's name and age as an object. We then
create a new list item and append it to the list. Awesome!
### Improving the User Experience
One last thing we can do is to clear the form after the submission. Add the
following code to the end of the event listener.
```js
// ...
list.appendChild(listItem);
// Clear the form
form.reset();
```
With this change, the form will be cleared after the submission. This is a small
detail that can improve the user experience, as the user will be ready to submit
another student without having to clear the form manually.
## Refactoring
Our code is starting to get a little repetitive. Let's look at how to improve
things a bit.
First, let's create a function to add a student to the list.
```js
function addStudentToList(student) {
const list = document.getElementById("students");
const listItem = document.createElement("li");
listItem.innerText = `${student.name} (${student.age})`;
list.appendChild(listItem);
}
```
This function receives a student object and adds it to the list. Now, let's
update the event listener to use this function.
```js
form.addEventListener("submit", async (event) => {
event.preventDefault();
const formData = new FormData(form);
const response = await fetch("http://localhost:3000/add-student", {
method: "POST",
body: new URLSearchParams(formData),
headers: {
"content-type": "application/x-www-form-urlencoded",
},
});
const student = await response.json();
addStudentToList(student);
form.reset();
});
```
This is much better. We have separated the logic to add a student to the list
into a function. This makes our code easier to read and maintain.
We can also update the initial list of students to use this function.
```js
fetch("http://localhost:3000/students")
.then((response) => response.json())
.then((students) => {
for (const student of students) {
addStudentToList(student);
}
});
```
This is a great improvement. Our code is now more organized and easier to
understand.
This practice of avoiding repetition is part of the **KISS** principle. KISS
stands for **"Keep It Simple, Stupid"**. It is a design principle that states
that most systems work best if they are kept simple rather than made
complicated. This principle is especially important in software development,
where complexity can lead to bugs and maintenance issues.
## Conclusion
In this post, we learned how to handle form submissions in our backend. We also
learned how to prevent the default behavior of HTML forms using JavaScript. We
updated the list of students without having to reload the page, which is a great
improvement in the user experience.
The biggest issue with our current implementation is that we are storing the
students in memory. This means that if the server restarts, all the students
will be lost. In the next post, we will learn how to store the students in a
database so that they are persisted even if the server restarts.
> As usual, you can find the code for this post on
> [GitHub](https://github.com/raggesilver/blog-04-example).